
Jean Lebegue and Samuel Thomas are teachers at Hoboken High School in Hoboken, New Jersey, currently teaching PLTW Biomedical Science courses.
From the beginning of the pandemic until now, there are countless lessons we have learned as PLTW Biomedical Science teachers. Teaching remotely forces us to reevaluate our teaching methods and adopt technology that we hadn’t used regularly before March 2020. Despite the many obstacles and changes we faced as teachers and students, we realized there are so many practices we have developed that we will continue to use in our classrooms, even after this pandemic is over. We have compiled a list of seven tips that have been a big help to our teaching. We hope that they will benefit other PLTW teachers as well!
Tip #1: Include a video!
Pre-recorded videos are a great resource for asynchronous instruction. There are a number of free and premium screen recording applications that can be utilized. Do Nows can be done, notes can be taken, and explanations of how to complete the activity for the day can be clearly explained through a video call versus a long, written explanation. The amount of guidance you provide is up to you.
Tip #2: Yes… you can do labs!
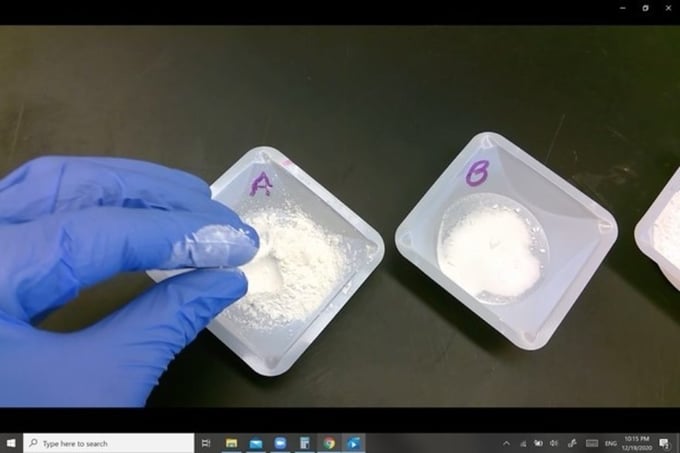
For obvious reasons, many of the labs conducted in a PLTW Biomedical Science classroom are difficult to complete in a remote setting. To provide remote students with the closest possible approximation to this important hands-on component, we have recorded videos of all of the aspects of a lab period. We upload one or more videos for our remote students to watch. One video can be for discussion and theory, another for how to fill in a data table or graph, and still another can be taken in the lab to show how the experiment would be conducted in person. A camera can be rigged and propped up while the instructor demonstrates each step of the procedure. The key emphasis here is for the students to be able to analyze data and form a conclusion. In addition to the videos, sometimes good quality photos of experimental results can help students with data analysis. We believe when we, as the classroom teachers, show the students the lab, it makes a big difference in engagement! Some examples from Principles of Biomedical Science are below:
Example #1: For the unknown substances lab, students observed the various colors of the powders, and we as instructors described the consistency in detail. Students recorded these results. They witnessed the adding of the reagents and were able to see the bubbling and fizzing that took place!
Example #2: For the DNA extraction, students were able to observe the procedure step-by-step and see how the DNA precipitated out of solution in the ethanol. This year, we decided to do strawberry extraction for safety reasons. They were able to see the DNA when it was spooled onto a glass rod! They answered higher order questions based on the procedure and results.
Example #3: For blood splatter analysis, students watched as blood was dropped onto absorbent paper. They were able to take measurements as the ruler was put up to each blood droplet and recorded the results. They graphed and interpreted these results on their own.
Tip #3: Video assessments!
For our Human Body Systems class, students have been able to pick up lab materials from the high school and complete activities from home. We have found the best way to assess activities like dissections or labeling their manikins is student created videos. Students use Flipgrid to create short videos pointing out regional terms or labeling lobes of the brain. This has proved to be very effective at creating meaningful engagement and assessing their hands on skills while at home! This form of assessment can be used throughout the PLTW curriculum.

